Building a DIY cat cave is a creative expression and a loving gesture towards your furry friend.
With their love for snug hideaways, cats often enjoy spaces crafted just for them. But what if you could make it extra special?
Join us as we share a delightful DIY story from TheCatSite.com member NewYork1303.
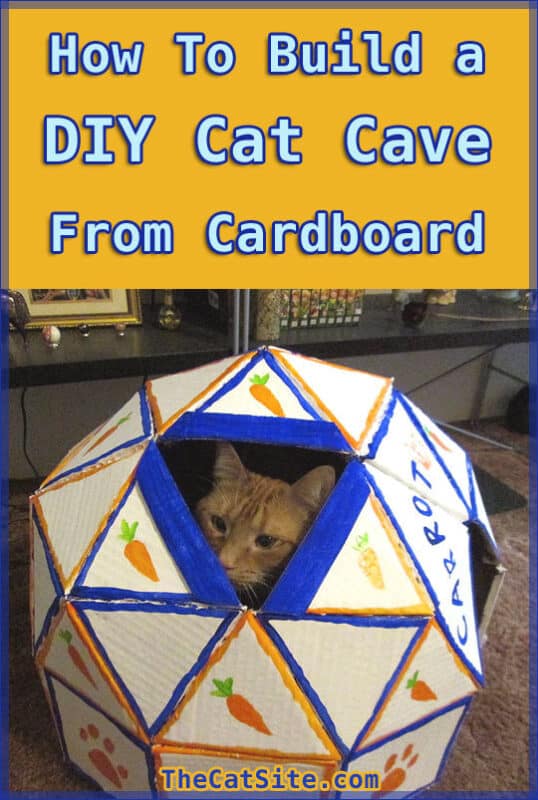
Through a weekend of imagination and dedication, NewYork1303 created a cardboard cat cave for a beloved cat named Carrot.
It's a tale of creativity, love, and the timeless bond between a cat and its human.
Grab your crafting supplies and get ready to be inspired. Your cat's new favorite place to lounge could be just a few cardboard cuts away!
Steps to Create a DIY Cat Cave from Cardboard
When NewYork1303 first brought Carrot home, this unique cat clearly deserved something extraordinary.
Having been returned to the shelter twice, NewYork1303 was determined to make him feel loved in his forever home.
The idea to build a unique indoor playhouse took shape, and here's how NewYork1303 turned cardboard into a delightful cave for Carrot.
1. Finding Inspiration
Wanting more than just a store-bought cat house, NewYork1303 found an article about a geodesic dome playhouse for children.
The decision to create a smaller version for a cat formed, promising a weekend project well worth the effort.
2. Preparing the Materials
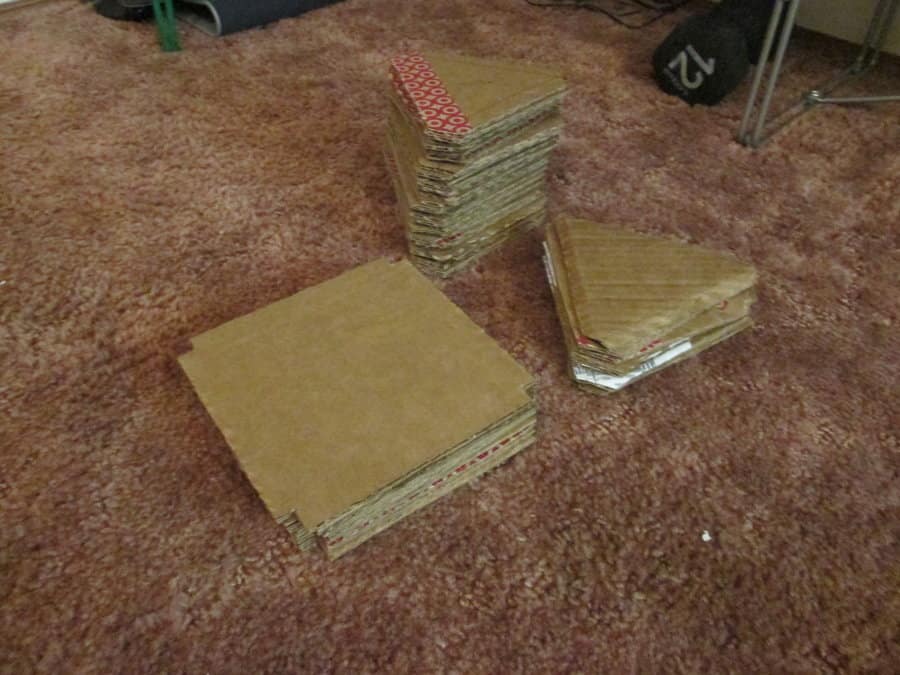
Gathering the Shapes
NewYork1303 gathered:
- 30 AAB triangles
- 10 BBB triangles
- 10 B squares
- Lengths of 5.5 inches for A and 6 inches for B
Though a door and window would reduce the need, NewYork1303 prepared all, ultimately using 8 BBB triangles and 9 B squares.
Measuring and Cutting
NewYork1303 measured, drew, and labeled the patterns on cardboard, adding a half-inch tab to each side for gluing.

Click here to see these cardboards on Amazon.
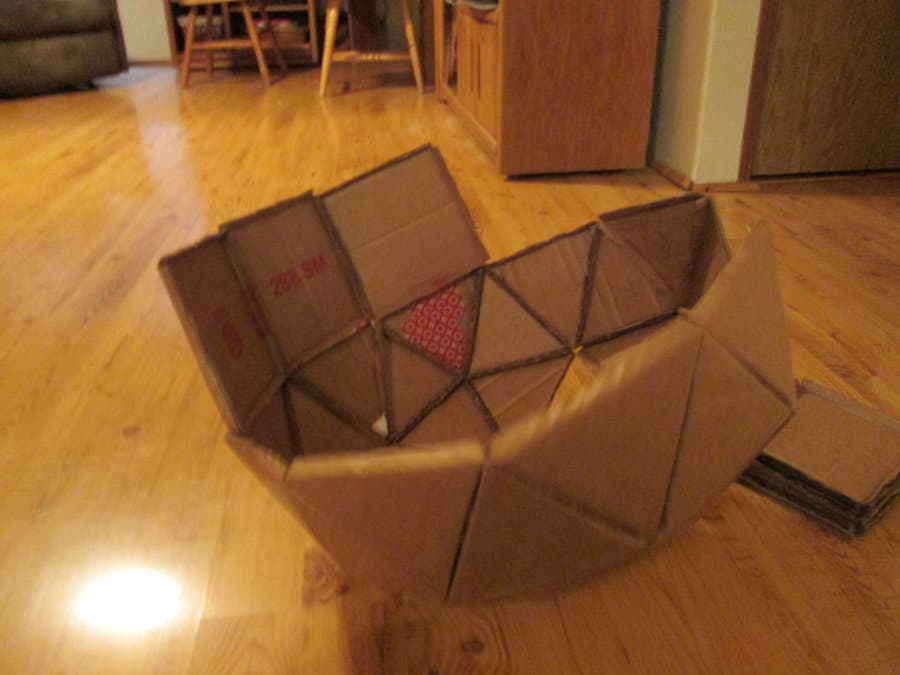
3. Organizing the Shapes
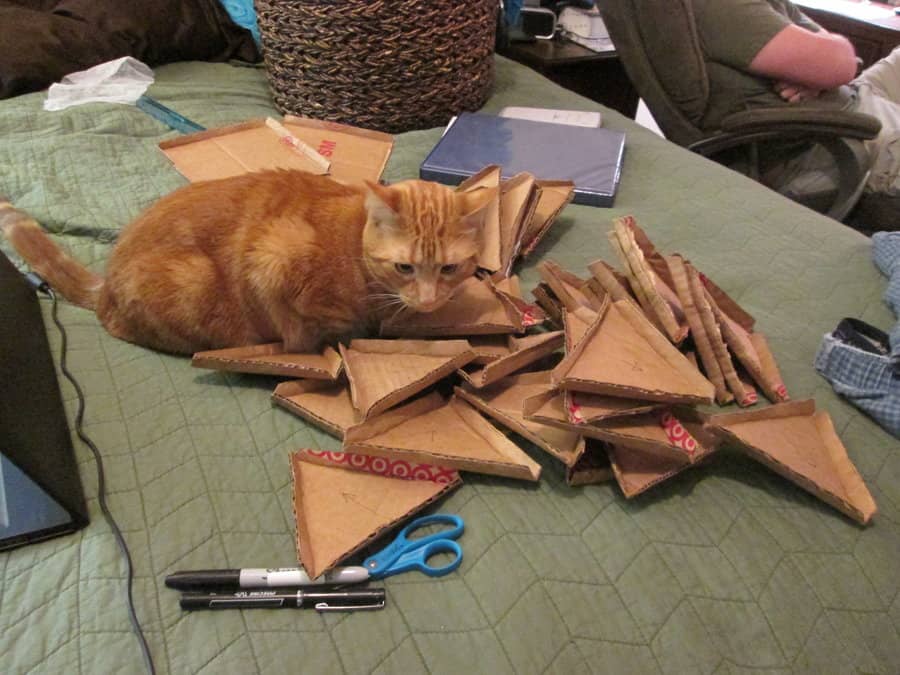
After cutting, NewYork1303 folded the shapes over the tabs, used a ruler's tip to create a crease, and stacked them in groups for organization.

Click here to see this ruler on Amazon.
4. Constructing the Dome
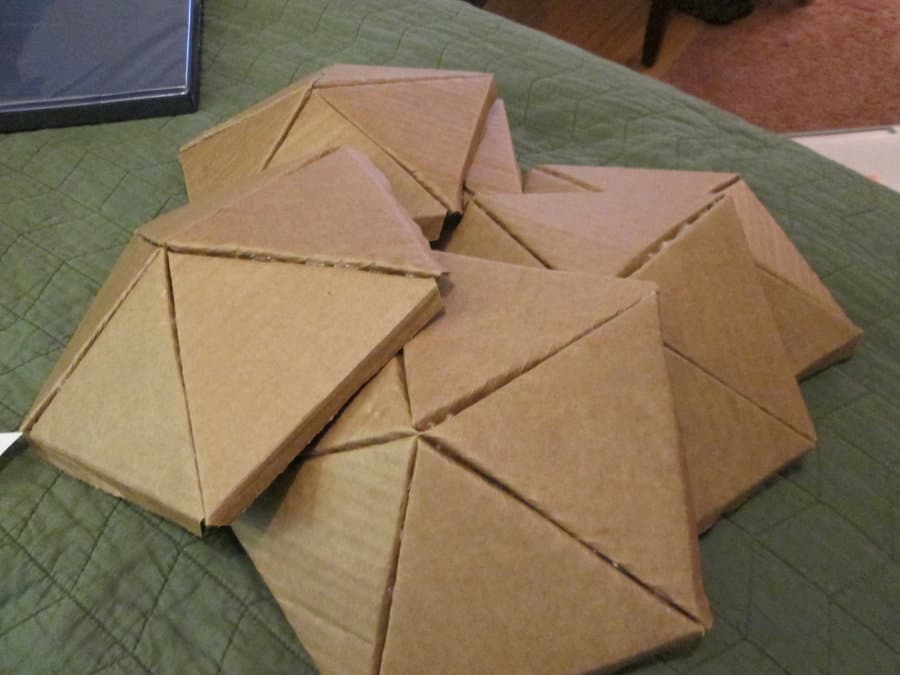
Forming the Pentagons
NewYork1303 glued five AAB triangles together to form pentagons, preparing six in total.

Click here to see this glue gun kit on Amazon.
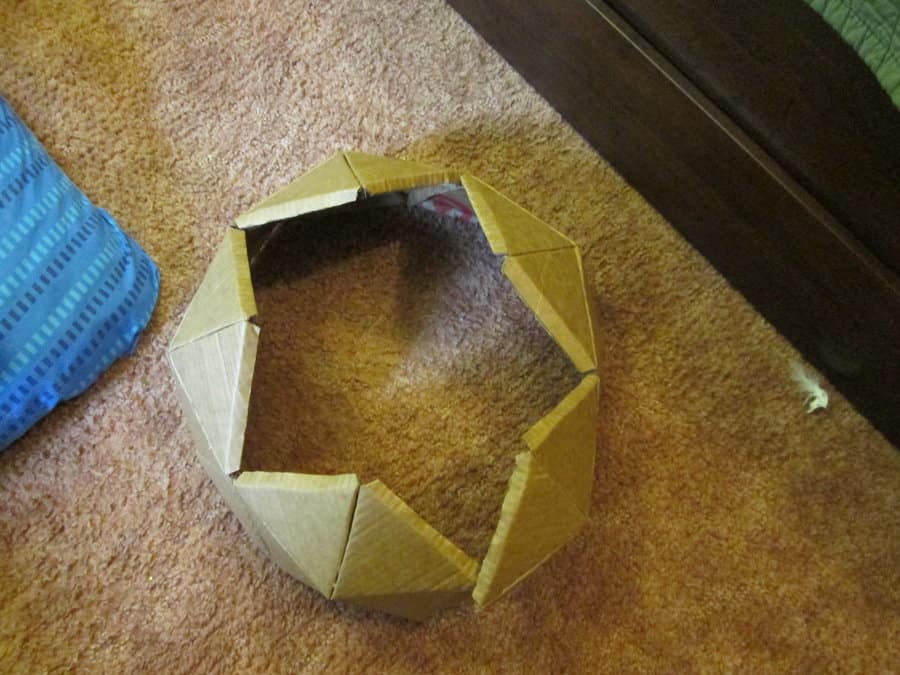
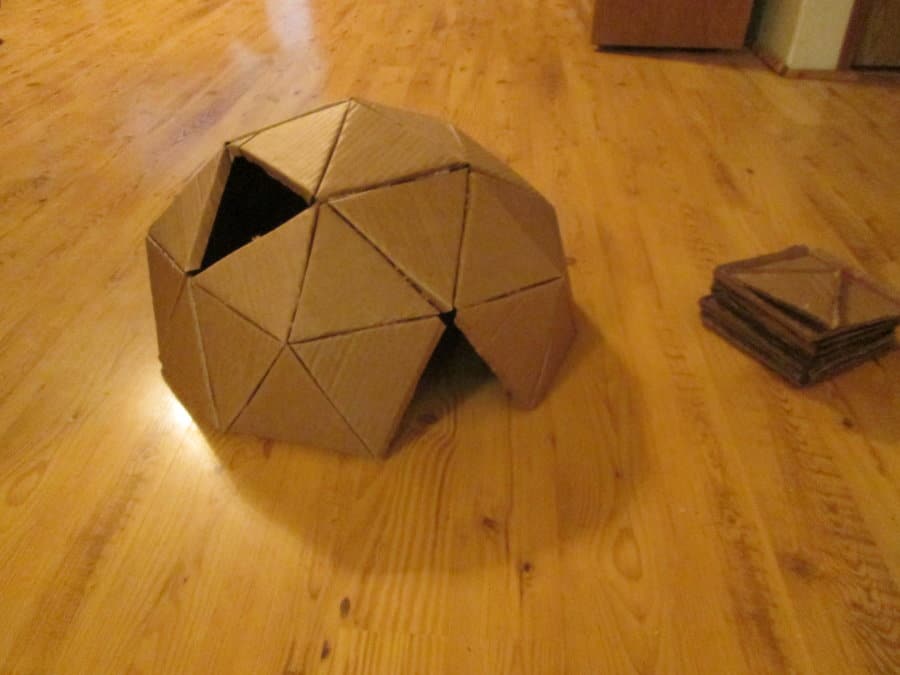
Connecting the Pentagons
NewYork1303 connected five pentagons with BBB triangles left one side open for the door, and stood up the structure, revealing a star pattern.
SIGN UP FOR THECATSITE'S EMAIL UPDATES >
Adding the Remaining Triangles
NewYork1303 glued the remaining BBB triangles into the pattern, leaving one out for a window, and glued the final pentagon to the edges, except where the window was.
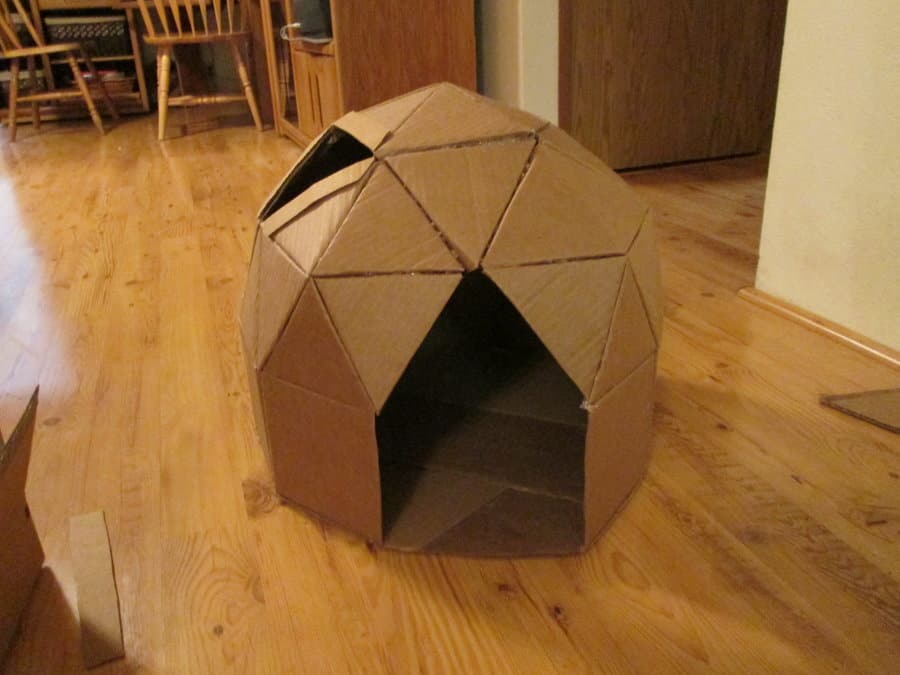
5. Adding the Base
NewYork1303 glued the B squares to the bottom exposed sides, leaving one square out for the door.
6. Adding Details
NewYork1303 added a window frame using rectangular cardboard and installed a floor by gluing large cardboard pieces.
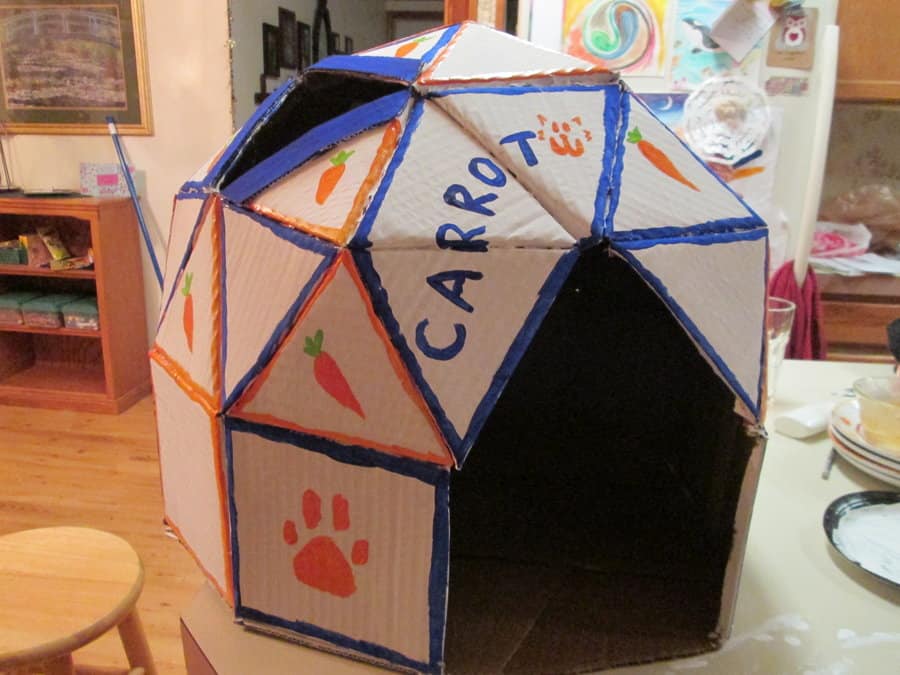
7. Painting and Decorating
NewYork1303 painted the entire house with two white coats, then added colorful designs.
A New Playground Comes to Life
True to cat nature, Carrot ignored the house for weeks before embracing it. The playhouse became livelier with the new kitten Angua as they took turns hiding and pouncing.

The success of NewYork1303's DIY cat cave is more than a crafting achievement; it's a symbol of creativity and love.
With cardboard, paint, and imagination, this story inspires us all to create unique spaces that bring joy to our furry friends.
It's a heartwarming reminder that the simplest projects can sometimes lead to the most cherished memories and connections.
Share this DIY project on your social media by pinning the image below; your friends will love it.
SIGN UP FOR THECATSITE'S EMAIL UPDATES >
Read more interesting articles we have below.
9 Types Of Cat Furniture You Should Know
17+ Ideas For Cat-safe Holiday Decorations (An Illustrated Guide)
Note: We may get commissions for purchases made through links on this page.

14 comments on “How To Build A DIY Cat Cave From Cardboard [Step By Step Guide]”