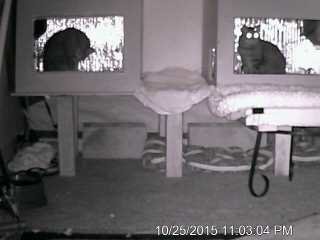
I wanted to post some detailed instructions for the heated houses my husband has built. This will be my third winter using the first one that was built. The second one was just built this month. During the most frigid winters of 2014 and 2015, this house kept my ferals snug, warm and dry. We had wind chills of -45 F and the house did not drop below 30. I hope this helps someone out.
Heated Cat House Instructions

While the final product works great and seems rather intricate, the actual building process really isn’t that daunting. If you have used a circular saw, jigsaw, caulk gun, glue gun and a drill for inserting screws, you can build a Heated House. Hopefully these steps will help you.
Disclaimer:
This is merely my documentation of the steps I took to build two Heated Houses, and is not a guarantee that if you followed this document you will get the same results. Use it only as a reference and suggestions for how you might build it. Additionally, please be very careful in using power tools and other tools that can cause harm if not used properly or you are not properly protected (e.g. Safety Glasses).
Parts List:
Cut wood
The referenced pattern below should be able to utilize one 4×8’ sheet of plywood if planned properly and cut carefully (with circular saw). For the first Heated House, we used MDF, however, that is probably not the best for the elements and is heavier than plywood.
Note that the widths of the sides and bottom (22”) are one inch shorter than the top. This is to allow the sides and bottom to fit inside the front and back pieces when attached. I have selected one inch if you are using 0.5” thick plywood. If you are using thicker plywood, change this 22” width to be 23” minus two times your width. (This also applies to the length of the bottom piece.)
After cutting the sides, you will need to cut out the opening for the window and door. I use a spade bit in the corners and then a jigsaw to cut out the hole.
There are two holes in the sides to accommodate cords from the Hound Heater and any items you use inside the Heated House (e.g. heated pads). The hole for the Hound Heater should be positioned based on the Heater instructions. The hole in the back can be located anywhere you feel your cords will be exiting the back.
Paint wood
Our Heated House is protected from the elements under a tent, but we still paint the exterior for looks and in case it gets wet. First apply one coat of primer, followed by one coat of the exterior house/trim paint of your choice. We painted the first house after it was built, and the second house after the wood was cut, and much prefer painting the individual panels. It is easier to handle and you can more easily use a roller. Only pain the outside and edges of the sides.
Cut Plexiglass
I like to cut my plexiglass/acrylic to a one-inch boarder wider than the hole in the front (the hole for my window is 12×20”, so my Plexiglas is 14×22”. I have found a standard blade on a circular saw (or table saw, if you are fortunate enough to have one) is good enough. Just keep the film on the sheet (or apply masking tape if it isn’t on), mark your line, and use a smooth, consistent motion through the length of the sheet.
After cutting, I sometimes have used a piece of sandpaper to smooth the edges. Also, I will drill small holes (slightly larger than the screws you will using to attach the window) in the corners (1/2” from the edges) and two holes at the middle of the top and bottom.
Attach plexiglas
To attach the Plexiglas, you will need to find some screws that are less than 0.75” in length. Put a bead of caulk on the inside of the front panel about 0.5” around the opening. Place the plexiglas on top to make sure the holes are outside the opening. Place your screws in the six holes you created, making a snug connection.
Once it is attached, flip the front panel over and caulk along the Plexiglas and opening of “window” to make sure there is a nice seal.
Insulation
Ann uses the Reflectix Insulation in all her shelters. It comes in a roll and is very easy to work with. I use a hot-glue gun to attach it to the inside of each panel. I offset it by 0.5” when needed for when the panels will be attached. You can always use a box cutter to trim after applying when needed. When there are seams of multiple pieces, there is a metal-like tape you can use to cover the seam.
Attach Walls
Probably the most difficult step of the process is attaching the sides together to make the “box”. This is difficult to line them up properly, make adjustments to your cuts or Reflectix application, and inserting the screws so they are not protruding. Since you only have 0.5” to place a screw, be careful with these steps.
For the second box, I learned to make a pilot hole with a small drill bit through the two panels I am connecting, at least for the first couple screws on each connection, and this helped tremendously. I started connecting one of the sides to the bottom, then connect the front to the side and bottom, then the other side, and then the back. DO NOT attach the top, yet. It helps, having someone hold the two sides while you drill the pilot holes and drill the screws in, at least for the first couple sides.
The first box worked great, and my original measurements and cuts worked out perfectly. The second box seemed to have different wood thicknesses (I used some scraps I had lying around) and I made a bad cut on one side. Thus, the sides didn’t line up that well, and I had to trim a side of the bottom. It could have worked, but the edge wouldn’t have lined up evenly, so it is up to you whether you want to be that picky.
Place at least three screws per connection of two sides. Once you feel you have it and it is solid, go around with your caulk and seal up any seam that might let air leak.
Attach Hound Heater
You should follow the mounting instructions that come with your heater. I place the heater on the opposite wall from the “door”. I cut the hole needed for the cord on the side panel first, then attached the Reflectix, made a cut in the Reflectix over the hole, then passed the cord through the slit. You should be able to use the same screws you used for the Plexiglas to attach the Hound Heater and the baffle plate that sits above it.
Attach Top
Now everything is completed in side the Heated House, you can attach the top. I attach hinges to the back so the top can be lifted to be able to maintain the inside and adjust the thermostat on the Hound Heater.
I use two 12” continuous hinges along the back of the top. I carefully align the top to cover the entire house, and trim any Reflectix that is needed. Once in position, align the hinge to the back edge of the top and the side of the back. Once again, drill small pilot holes and attach a screw, one at a time for each hinge until the hinge is held in place. Then, attach the rest of the screws.
Attach Hook and Eyelet
In order to provide a tight seal when the top is down to avoid heat escaping, I attach a hook and eyelet to the front of the top and house (there are several ways to accomplish a tight seal other than this method).
Attach Handles
Being 27x24x23, the house is a little cumbersome to maneuver/carry. Thus, I cut a 3-4” piece of 2×2” (or equivalent) and attach it to the top of each side. This allows me (or a partner) to have a grip when carrying.
Optional Outlets
Since Ann has three plugs to attach (the Hound Heater and two heat pads), I decided to attach a double-gang box with two receptacles to accommodate four plugs to the top of the Heated House. Do not attempt this if you are not comfortable working with electrical components. Otherwise, it is just like adding an outlet to your house, and using an old extension cord with the female end cut off.
Heated Cat House Instructions

While the final product works great and seems rather intricate, the actual building process really isn’t that daunting. If you have used a circular saw, jigsaw, caulk gun, glue gun and a drill for inserting screws, you can build a Heated House. Hopefully these steps will help you.
Disclaimer:
This is merely my documentation of the steps I took to build two Heated Houses, and is not a guarantee that if you followed this document you will get the same results. Use it only as a reference and suggestions for how you might build it. Additionally, please be very careful in using power tools and other tools that can cause harm if not used properly or you are not properly protected (e.g. Safety Glasses).
Parts List:
- 1 8×4’ piece of plywood (at least ½” thick)
- 1 ¼” thick plexiglass/acrylic sheet at least 14×22”
- 1 Hound Heater (specs/link)
- Roll of Reflectix insulation
- Reflectix seam tape
- 2 12×1.5” hinges
- 1 1/4” exterior screws
- Misc other screws
- Clear exterior caulk
- Hook/Eyelet
- Primer
- Exterior paint
- Electrical Outlet Option
- Double gang box
- Two outlets
- Double gang metal cover
- 10’ 14-gauge extension cord with plug attached
- Cord/box clamp
- Hound Heater
- Circular saw
- Jigsaw
- Drill
- Glue gun
- Caulk gun
- Box cutter
Cut wood
The referenced pattern below should be able to utilize one 4×8’ sheet of plywood if planned properly and cut carefully (with circular saw). For the first Heated House, we used MDF, however, that is probably not the best for the elements and is heavier than plywood.

Note that the widths of the sides and bottom (22”) are one inch shorter than the top. This is to allow the sides and bottom to fit inside the front and back pieces when attached. I have selected one inch if you are using 0.5” thick plywood. If you are using thicker plywood, change this 22” width to be 23” minus two times your width. (This also applies to the length of the bottom piece.)
After cutting the sides, you will need to cut out the opening for the window and door. I use a spade bit in the corners and then a jigsaw to cut out the hole.
There are two holes in the sides to accommodate cords from the Hound Heater and any items you use inside the Heated House (e.g. heated pads). The hole for the Hound Heater should be positioned based on the Heater instructions. The hole in the back can be located anywhere you feel your cords will be exiting the back.
Paint wood
Our Heated House is protected from the elements under a tent, but we still paint the exterior for looks and in case it gets wet. First apply one coat of primer, followed by one coat of the exterior house/trim paint of your choice. We painted the first house after it was built, and the second house after the wood was cut, and much prefer painting the individual panels. It is easier to handle and you can more easily use a roller. Only pain the outside and edges of the sides.

Cut Plexiglass
I like to cut my plexiglass/acrylic to a one-inch boarder wider than the hole in the front (the hole for my window is 12×20”, so my Plexiglas is 14×22”. I have found a standard blade on a circular saw (or table saw, if you are fortunate enough to have one) is good enough. Just keep the film on the sheet (or apply masking tape if it isn’t on), mark your line, and use a smooth, consistent motion through the length of the sheet.
After cutting, I sometimes have used a piece of sandpaper to smooth the edges. Also, I will drill small holes (slightly larger than the screws you will using to attach the window) in the corners (1/2” from the edges) and two holes at the middle of the top and bottom.
Attach plexiglas
To attach the Plexiglas, you will need to find some screws that are less than 0.75” in length. Put a bead of caulk on the inside of the front panel about 0.5” around the opening. Place the plexiglas on top to make sure the holes are outside the opening. Place your screws in the six holes you created, making a snug connection.

Once it is attached, flip the front panel over and caulk along the Plexiglas and opening of “window” to make sure there is a nice seal.

Insulation
Ann uses the Reflectix Insulation in all her shelters. It comes in a roll and is very easy to work with. I use a hot-glue gun to attach it to the inside of each panel. I offset it by 0.5” when needed for when the panels will be attached. You can always use a box cutter to trim after applying when needed. When there are seams of multiple pieces, there is a metal-like tape you can use to cover the seam.


Attach Walls
Probably the most difficult step of the process is attaching the sides together to make the “box”. This is difficult to line them up properly, make adjustments to your cuts or Reflectix application, and inserting the screws so they are not protruding. Since you only have 0.5” to place a screw, be careful with these steps.
For the second box, I learned to make a pilot hole with a small drill bit through the two panels I am connecting, at least for the first couple screws on each connection, and this helped tremendously. I started connecting one of the sides to the bottom, then connect the front to the side and bottom, then the other side, and then the back. DO NOT attach the top, yet. It helps, having someone hold the two sides while you drill the pilot holes and drill the screws in, at least for the first couple sides.

The first box worked great, and my original measurements and cuts worked out perfectly. The second box seemed to have different wood thicknesses (I used some scraps I had lying around) and I made a bad cut on one side. Thus, the sides didn’t line up that well, and I had to trim a side of the bottom. It could have worked, but the edge wouldn’t have lined up evenly, so it is up to you whether you want to be that picky.

Place at least three screws per connection of two sides. Once you feel you have it and it is solid, go around with your caulk and seal up any seam that might let air leak.


Attach Hound Heater
You should follow the mounting instructions that come with your heater. I place the heater on the opposite wall from the “door”. I cut the hole needed for the cord on the side panel first, then attached the Reflectix, made a cut in the Reflectix over the hole, then passed the cord through the slit. You should be able to use the same screws you used for the Plexiglas to attach the Hound Heater and the baffle plate that sits above it.


Attach Top
Now everything is completed in side the Heated House, you can attach the top. I attach hinges to the back so the top can be lifted to be able to maintain the inside and adjust the thermostat on the Hound Heater.
I use two 12” continuous hinges along the back of the top. I carefully align the top to cover the entire house, and trim any Reflectix that is needed. Once in position, align the hinge to the back edge of the top and the side of the back. Once again, drill small pilot holes and attach a screw, one at a time for each hinge until the hinge is held in place. Then, attach the rest of the screws.


Attach Hook and Eyelet
In order to provide a tight seal when the top is down to avoid heat escaping, I attach a hook and eyelet to the front of the top and house (there are several ways to accomplish a tight seal other than this method).

Attach Handles
Being 27x24x23, the house is a little cumbersome to maneuver/carry. Thus, I cut a 3-4” piece of 2×2” (or equivalent) and attach it to the top of each side. This allows me (or a partner) to have a grip when carrying.
Optional Outlets
Since Ann has three plugs to attach (the Hound Heater and two heat pads), I decided to attach a double-gang box with two receptacles to accommodate four plugs to the top of the Heated House. Do not attempt this if you are not comfortable working with electrical components. Otherwise, it is just like adding an outlet to your house, and using an old extension cord with the female end cut off.